VueJS
Learning Vue.js in Bangla part-3: VueJS Components and Events
VueJS এ events কি?
VueJS এ events বুঝার আগে , আমাদেরকে JavaScript এর event কি সেটি বুজতে হবে। মূলতঃ ওয়েব পেজে (ডকুমেন্ট বা ব্রাউজারে) ইউজারের মাউস , কীবোর্ড অথবা টাচপ্যাড এর বিভিন্ন মুভমেন্ট বা এক্টিভিটি যেমন onclick, ondbclick, onmouseover,onmouseout, onload, hover. onblur,onchange ,onkeydown ইত্যাদি একটিভিটি গুলোকে JavaScript Events বলে। ঠিক একই রকম events গুলো আমরা VueJS এ দেখতে পাই। VueJS এ v-on directive দিয়ে DOM events গুলো সিলেক্ট করে , এবং VueJS এর property, method গুলো apply করে।
এবার চলুন VueJS event দিয়ে একটা উদাহরণ দেখা যাক:
<html>
   <head>
      <title>VueJs Events</title>
       <script type = "text/javascript" src = "https://cdn.jsdelivr.net/npm/vue/dist/vue.js"></script>
   </head>
   <body>
     <div id="example-1">
      <button v-on:click="counter += 1">Add 1</button>
      <p>The button above has been clicked {{ counter }} times.</p>
    </div>
      <script type = "text/javascript">
      var example1 = new Vue({
        el: '#example-1',
        data: {
          counter: 0
        }
      });
      </script>
   </body>
</html>
Result
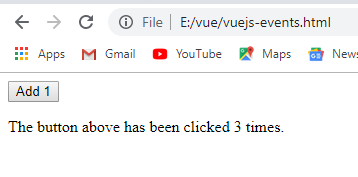
এখানে আপনি বাটনটি যতবার ক্লিক করবেন , ততবার এক এক করে নম্বর টি বাড়তে থাকবে।
তবে আপনি চাইলে v-on:click এর পরিবর্তে @click ও ব্যবহার করতে পারেন।
<html>
   <head>
      <title>VueJs Events</title>
       <script type = "text/javascript" src = "https://cdn.jsdelivr.net/npm/vue/dist/vue.js"></script>
   </head>
   <body>
     <div id="example-1">
      <button @click="counter += 1">Add 1</button>
      <p>The button above has been clicked {{ counter }} times.</p>
    </div>
      <script type = "text/javascript">
      var example1 = new Vue({
        el: '#example-1',
        data: {
          counter: 0
        }
      });
      </script>
   </body>
</html>
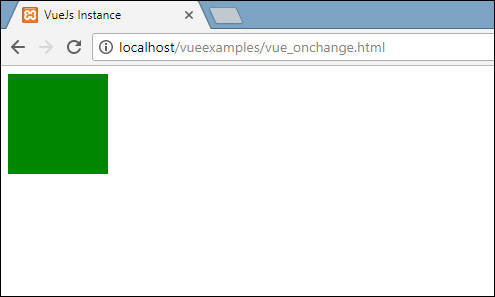
এবার চলুন mouseover এবং mouseout event দিয়ে একটা উদাহরণ দেখি।
<html>
   <head>
      <title>VueJs Events</title>
     <script type = "text/javascript" src = "https://cdn.jsdelivr.net/npm/vue/dist/vue.js"></script>
   </head>
   <body>
      <div id = "databinding">
         <div v-bind:style = "boxstyle" @mouseover = "changebgcolor" v-on:mouseout = "originalcolor"></div>
      </div>
      <script type = "text/javascript">
         var vm = new Vue({
            el: '#databinding',
            data: {
               boxstyle : {
                  width:"100px",
                  height:"100px",
                  backgroundColor:"red"
               }
            },
            methods : {
               changebgcolor : function() {
                  this.boxstyle.backgroundColor = "green";
               },
               originalcolor : function() {
                  this.boxstyle.backgroundColor = "red";
               }
            },
         });
      </script>
   </body>
</html>
এবার আপনি আপনার মাউস পয়েন্টারকে লাল রঙের বক্সের উপর নিলেই নিচের মতো ফলাফল দেখতে পারবেন।

এবার চলুন onkeyup event দিয়ে একটা উদাহরণ দেখি।
<html>
   <head>
      <title>VueJs .key Modifier</title>
     <script type = "text/javascript" src = "https://cdn.jsdelivr.net/npm/vue/dist/vue.js"></script>
   </head>
   <body>
       <div id = "databinding">
         <input type = "text" v-on:keyup = "showinputvalue" v-bind:style = "styleobj" placeholder = "Enter your name"/>
         <h3> {{name}}</h3>
      </div>
      <script type = "text/javascript">
         var vm = new Vue({
            el: '#databinding',
            data: {
               name:'',
               styleobj: {
                  width: "30%",
                  padding: "12px 20px",
                  margin: "8px 0",
                  boxSizing: "border-box"
               }
            },
            methods : {
               showinputvalue : function(event) {
                  this.name=event.target.value;
               }
            }
         });
      </script>
   </body>
</html>
Output

VueJS .once Event Modifiers
VueJS এ v-on attribute এ .once নামে একটি modifiers আছে , যা দিয়ে আপনি যেকোনো event কে শুধু মাত্র একবার execute করতে পারবেন। নিচের উদাহরণটি দেখুন :
<html>
   <head>
      <title>VueJs Event Modifieres</title>
       <script type = "text/javascript" src = "https://cdn.jsdelivr.net/npm/vue/dist/vue.js"></script>
   </head>
   <body>
      <div id = "databinding">
         <button v-on:click.once = "buttonclickedonce" v-bind:style = "styleobj">Click Once</button>
         Output:{{clicknum}}
         <br/><br/>
         <button v-on:click = "buttonclicked"  v-bind:style = "styleobj">Click Me</button>
         Output:{{clicknum1}}
      </div>
      <script type = "text/javascript">
         var vm = new Vue({
            el: '#databinding',
            data: {
               clicknum : 0,
               clicknum1 :0,
               styleobj: {
                  backgroundColor: '#2196F3!important',
                  cursor: 'pointer',
                  padding: '8px 16px',
                  verticalAlign: 'middle',
               }
            },
            methods : {
               buttonclickedonce : function() {
                  this.clicknum++;
               },
               buttonclicked : function() {
                  this.clicknum1++;
               }
            }
         });
      </script>
   </body>
</html>
Output
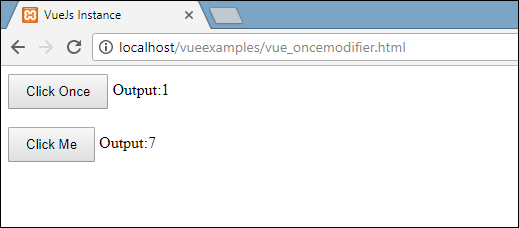
লক্ষ্য করবেন click once বাটনের শুধু একবার value বৃদ্ধি পাচ্ছে, আর অন্য বাটনটি প্রতিবারই ১ করে বৃদ্ধি পাচ্ছে।
VueJS .prevent Event Modifiers
.prevent Event Modifier ব্যবহার করে , আপনি যেকোনো ইভেন্ট কে prevent করতে পারবেন। তাহলে চলুন প্রথমে .prevent event modifier ব্যবহার না করে একটা উদাহরণ দেখা যাক:
<html>
   <head>
      <title>VueJs .prevent Modifier</title>
      <script type = "text/javascript" src = "js/vue.js"></script>
   </head>
   <body>
      <div id = "databinding">
         <a href = "http://www.google.com" v-on:click = "clickme" target = "_blank" v-bind:style = "styleobj">Click Me</a>
      </div>
      <script type = "text/javascript">
         var vm = new Vue({
            el: '#databinding',
            data: {
               clicknum : 0,
               clicknum1 :0,
               styleobj: {
                  color: '#4CAF50',
                  marginLeft: '20px',
                  fontSize: '30px'
               }
            },
            methods : {
               clickme : function() {
                  alert("Anchor tag is clicked");
               }
            }
         });
      </script>
   </body>
</html>
Output
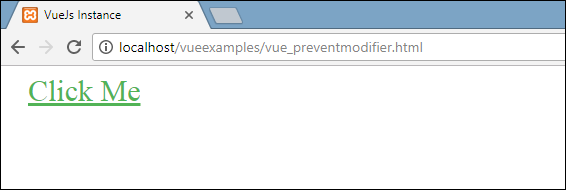
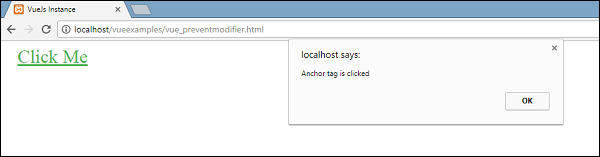
এখন আমরা যদি clickme লিংকে ক্লিক করি , তাহলে এটি আমাদেরকে “Anchor tag is clicked” একটা alert দিবে এবং নতুন tab এ https://www.google.com site এ যাবে। নিচের screenshots টি দেখুন।
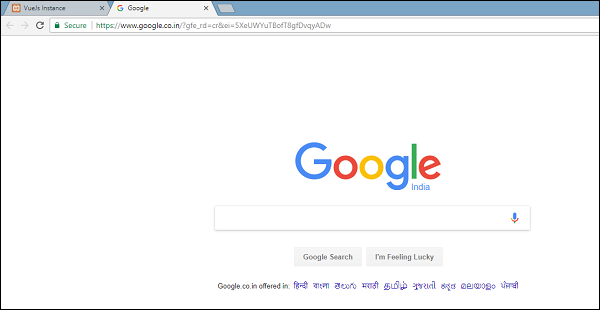
এখন এটি একটি সাধারণ উপায় হিসাবে কাজ করে, অর্থাত্ লিঙ্কটি আমরা যেভাবে চাইবো সেভাবে আমাদের জন্য খুলে । আমরা লিঙ্কটি না ওপেন করতে চাইলে, নিম্নলিখিত কোডের মতো আমাদের ‘prevent modifier যুক্ত করতে হবে।
<a href = "http://www.google.com" v-on:click.prevent = "clickme" target = "_blank" v-bind:style = "styleobj">Click Me</a>
এখন যদি আমরা বাটনে ক্লিক করি , এটি আমাদেরকে একটা এলার্ট মেসেজ দিবে, কিন্তু লিংকটি ওপেন হবেনা। কারণ .prevent modifier আমাদের জন্য লিংকটি ওপেন করা prevent করবে।
তাহলে চলুন সম্পূর্ণ কোডটি দেখা যাক:
<html>
   <head>
      <title>VueJs .prevent Modifier</title>
      <script type = "text/javascript" src = "js/vue.js"></script>
   </head>
   <body>
      <div id = "databinding">
         <a href = "http://www.google.com" v-on:click.prevent = "clickme" target = "_blank" v-bind:style = "styleobj">Click Me</a>
      </div>
      <script type = "text/javascript">
         var vm = new Vue({
            el: '#databinding',
            data: {
               clicknum : 0,
               clicknum1 :0,
               styleobj: {
                  color: '#4CAF50',
                  marginLeft: '20px',
                  fontSize: '30px'
               }
            },
            methods : {
               clickme : function() {
                  alert("Anchor tag is clicked");
               }
            }
         });
      </script>
   </body>
</html>
Output
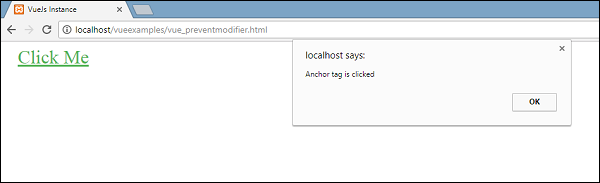
এখন আপনি শুধু alert টি দেখতে পাবেন , কিন্তু পেজ রিডাইরেক্ট হবেনা।
VueJS Key Event Modifiers
VueJS এ key modifier দিয়ে আমরা event handling কে control করতে পারি। ধরুন আমাদের একটা textbox আছে , এবং আমরা যদি সেই textbox এ কোনো কিছু লিখে এন্টার দেই , তাহলে একটা মেথড কল হবে। আর এই ধরণের কাজের জন্যে VueJS এ key modifier গুলোকে ব্যবহার করতে পারি।
VueJS এ key modifier এর syntax ঠিক নিচের মতো হবে।
v-on.eventname.keyname
তবে আপনি চাইলে একাধিক key যুক্ত করতে পারেন।
v-on.eventname.keyname.anotherkeyname
আরো ভালো ভাবে বুঝার জন্য নিচের কোডটি দেখুন :
<input type = "text" v-on:keyup.enter = "showinputvalue"/>
একাধিক key যুক্ত উদাহরণ :
<input type = "text" v-on:keyup.ctrl.enter = "showinputvalue"/>
এবার একটা পরিপূর্ন উদাহরণ দেখা যাক:
<html>
   <head>
      <title>VueJs .key Modifier</title>
     <script type = "text/javascript" src = "https://cdn.jsdelivr.net/npm/vue/dist/vue.js"></script>
   </head>
   <body>
       <div id = "databinding">
         <input type = "text" v-on:keyup.enter = "showinputvalue" v-bind:style = "styleobj" placeholder = "Enter your name"/>
         <h3> {{name}}</h3>
      </div>
      <script type = "text/javascript">
         var vm = new Vue({
            el: '#databinding',
            data: {
               name:'',
               styleobj: {
                  width: "30%",
                  padding: "12px 20px",
                  margin: "8px 0",
                  boxSizing: "border-box"
               }
            },
            methods : {
               showinputvalue : function(event) {
                  this.name=event.target.value;
               }
            }
         });
      </script>
   </body>
</html>
Output

VueJS এ Form Input Bindings
VueJS এ form এর input, textarea, and select element গুলোতে two-way data bindings এর জন্যে আমরা v-model directive টি ব্যবহার করতে পারি। চলুন প্রত্যেকটি form input এর আলাদা উদাহরণ দিয়ে বিষয়টা বুঝে নেয়া যাক:
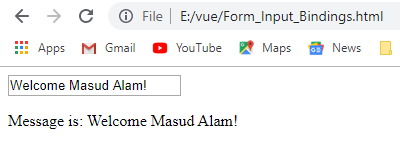
Text Input Example
<html>
   <head>
      <title>Form Input Bindings</title>
     <script type = "text/javascript" src = "https://cdn.jsdelivr.net/npm/vue/dist/vue.js"></script>
   </head>
   <body>
      <div id="example-1">
     <input v-model="message" placeholder="edit me">
<p>Message is: {{ message }}</p>

 <script>
new Vue({
  el: '#example-1',
  data: {
    message: ''
  }
})
</script>
   </body>
</html>
Output
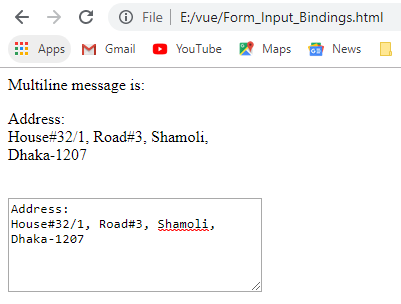
textarea Input Example
<html>
   <head>
      <title>Form Input Bindings</title>
     <script type = "text/javascript" src = "https://cdn.jsdelivr.net/npm/vue/dist/vue.js"></script>
   </head>
   <body>
      <div id="example-1">
    <span>Multiline message is:</span>
<p style="white-space: pre-line;">{{ message }}</p>
<br>
<textarea v-model="message" placeholder="add multiple lines"></textarea>
</div>
 <script>
new Vue({
  el: '#example-1',
  data: {
    message: ''
  }
})
</script>
   </body>
</html>
Output
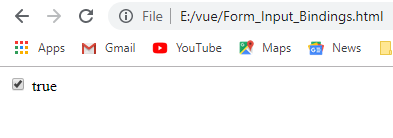
checkbox Input Example
<html>
   <head>
      <title>VueJs Form Input Bindings</title>
     <script type = "text/javascript" src = "https://cdn.jsdelivr.net/npm/vue/dist/vue.js"></script>
   </head>
   <body>
      <div id="example-1">
         <input type="checkbox" id="checkbox" v-model="checked">
         <label for="checkbox">{{ checked }}</label>
      </div>
      <script>
         new Vue({
            el: '#example-1',
            data: {
               checked: false
               }
            })
      </script>
   </body>
</html>
Output
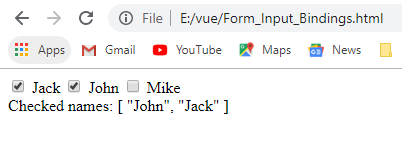
Multiple checkboxes Form input binding example
<html>
   <head>
      <title>VueJs Form Input Bindings</title>
     <script type = "text/javascript" src = "https://cdn.jsdelivr.net/npm/vue/dist/vue.js"></script>
   </head>
   <body>
      <div id='example-1'>
         <input type="checkbox" id="jack" value="Jack" v-model="checkedNames">
         <label for="jack">Jack</label>
         <input type="checkbox" id="john" value="John" v-model="checkedNames">
         <label for="john">John</label>
         <input type="checkbox" id="mike" value="Mike" v-model="checkedNames">
         <label for="mike">Mike</label>
         <br>
         <span>Checked names: {{ checkedNames }}</span>
</div>
      <script>
         new Vue({
            el: '#example-1',
            data: {
               checkedNames: []
               }
            })
      </script>
   </body>
</html>
Output
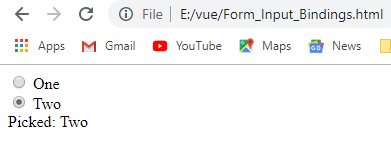
Multiple Radio Button Form input binding example
<html>
   <head>
      <title>VueJs Form Input Bindings</title>
     <script type = "text/javascript" src = "https://cdn.jsdelivr.net/npm/vue/dist/vue.js"></script>
   </head>
   <body>
      <div id='example-1'>
         <input type="radio" id="one" value="One" v-model="picked">
         <label for="one">One</label>
         <br>
         <input type="radio" id="two" value="Two" v-model="picked">
         <label for="two">Two</label>
         <br>
         <span>Picked: {{ picked }}</span>
</div>
      <script>
         new Vue({
            el: '#example-1',
           data: {
            picked: ''
            }
            })
      </script>
   </body>
</html>
Output
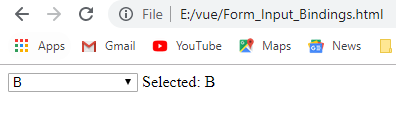
Select Box Form input binding example
<html>
   <head>
      <title>VueJs Form Input Bindings</title>
     <script type = "text/javascript" src = "https://cdn.jsdelivr.net/npm/vue/dist/vue.js"></script>
   </head>
   <body>
      <div id='example-1'>
        <select v-model="selected">
         <option disabled value="">Please select one</option>
         <option>A</option>
         <option>B</option>
         <option>C</option>
      </select>
<span>Selected: {{ selected }}</span>
</div>
      <script>
         new Vue({
            el: '#example-1',
           data: {
            selected: ''
            }
            })
      </script>
   </body>
</html>
Output
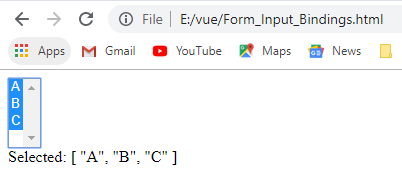
Multiple Select Box Form input binding example
<html>
   <head>
      <title>VueJs Form Input Bindings</title>
     <script type = "text/javascript" src = "https://cdn.jsdelivr.net/npm/vue/dist/vue.js"></script>
   </head>
   <body>
      <div id='example-1'>
       <select v-model="selected" multiple>
         <option>A</option>
         <option>B</option>
         <option>C</option>
      </select>
<br>
<span>Selected: {{ selected }}</span>
</div>
      <script>
         new Vue({
            el: '#example-1',
           data: {
            selected: ''
            }
            })
      </script>
   </body>
</html>
Output
VueJS এ Components কি?
Components হচ্ছে VueJS এর অন্যতম গুরুত্বপূর্ণ একটা features যা দিয়ে আমরা custom element গুলো তৈরি করতে পারি এবং সেটি HTML এ (reused) বারবার করতে পারি।
vueJS এ Component তৈরি করতে হলে Vue.component('nameofthecomponent',{ // options}); এই syntax দিয়ে করতে হয়। আর যখন একটি component তৈরি হয় , তখন component নাম টি একটি Custom HTML Element হয়ে যায় , আর সেই Custom HTML Element আমরা পরবর্তীতে HTML এ (reused) বারবার করতে পারি।
তাহলে চলুন আমরা component দিয়ে একটা sample code করি , এতে আমরা VueJS এর components সম্পর্কে আরো বিস্তারিত জানতে পারব।
<html>
   <head>
      <title>VueJs Components</title>
       <script type = "text/javascript" src = "https://cdn.jsdelivr.net/npm/vue/dist/vue.js"></script>
   </head>
   <body>
       <div id = "component_test">
         <testcomponent></testcomponent>
      </div>
      <div id = "component_test1">
         <testcomponent></testcomponent>
      </div>
      <script type = "text/javascript">
        Vue.component('testcomponent',{
         template : '<div><h1>This is coming from component</h1></div>'
         });
        var vm = new Vue({
         el: '#component_test'
      });
        var vm1 = new Vue({
         el: '#component_test1'
      });
      </script>
   </body>
</html>
এখানে প্রথমে আমরা component_test এবং component_test1 আইডি সহ দুটি div তৈরি করেছি , তারপর আমরা নিচে JavaScript অংশে Vue Class এর component Method দিয়ে testcomponent নামে একটা custom HTML তৈরি করি। তারপর আমরা আমাদের তৈরী নতুন custom html element টি দুটি div এ প্রদর্শনের জন্য দুটি vue instance তৈরী করি। এখন এটি রান করলে , ফলাফল ঠিক নিচের মতো আসবে।

এবার চলুন Vue Component এর আরেকটি উদাহরণ দেখা যাক:
<html>
   <head>
      <title>VueJs .key Modifier</title>
     <script type = "text/javascript" src = "https://cdn.jsdelivr.net/npm/vue/dist/vue.js"></script>
   </head>
   <body>
      <div id="components-demo">
         <button-counter></button-counter>
         <button-counter></button-counter>
      </div>
      <script type = "text/javascript">
         // Define a new component called button-counter
         Vue.component('button-counter', {
            data: function () {
               return {
                  count: 0
               }
            },
         template: '<button v-on:click="count++">You clicked me {{ count }} times.</button>'
})
        new Vue({ el: '#components-demo' })
      </script>
   </body>
</html>
Output
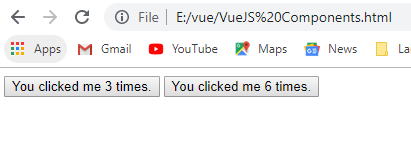
VueJS এর component data অবস্যই একটা ফাঙ্কশন হতে হবে। এটাকে সরাসরি object হিসেবে ব্যবহার করা যাবেনা। অর্থাৎ নিচের কোডের মতো দেওয়া যাবেনা।
data: {
  count: 0
}
আপনাকে ঠিক নিচের মতো করে লিখতে হবে।
 data: function () {
               return {
                  count: 0
               }
            }
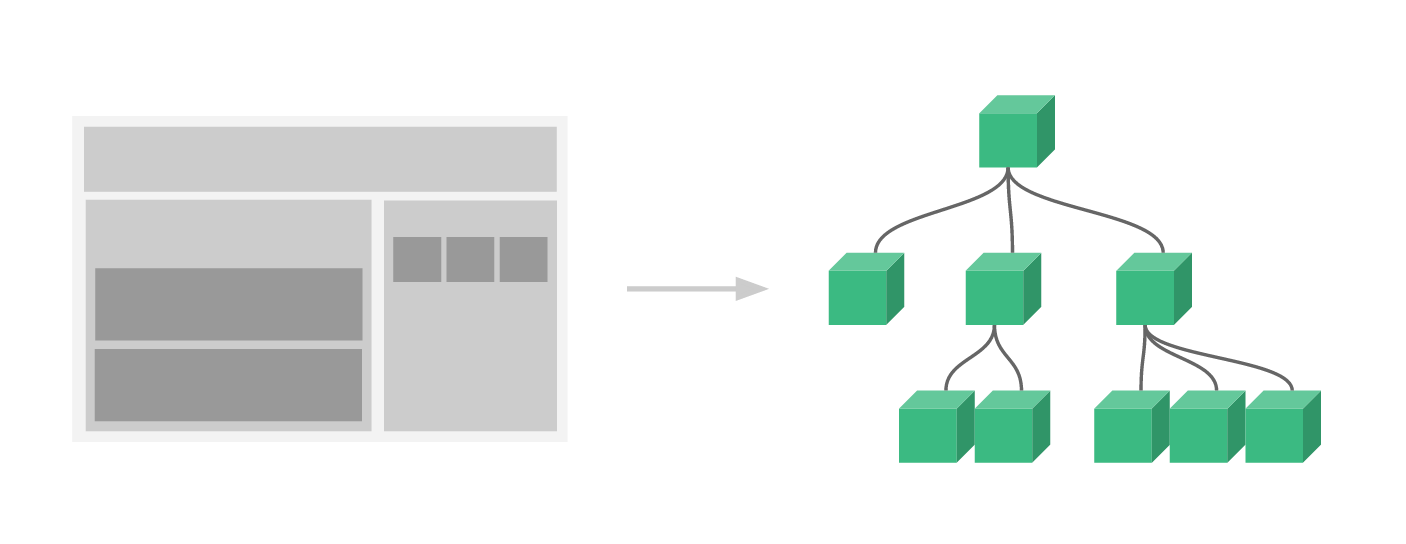
VueJS Components Organization
VueJS এ Components গুলো Nested Tree আকারে থাকে। ধরুন আপনার একটা ওয়েবসাইট , যেখানে আপনার header, sidebar এবং content_area এর মতো কিছু component রয়েছে। এবং এইসব component এর অধীনে আছে আবার যথাক্রমে navigations, links, blog posts এই সব components . আরো ভালো ভাবে বুঝার জন্য নিচের ফ্লোচার্ট টি দেখুন :
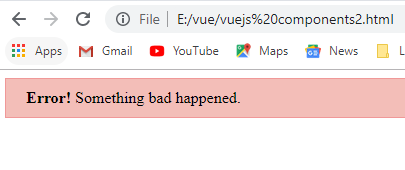
VueJS এ slots এর মাধ্যমে content distribution
VueJS এ slots এর মাধ্যমে content distribution টা অনেকটা HTML Elements এর মতো, এটা সাধারণতঃ content কে component এ পাস করার জন্য খুবই দরকারি। নিচের উদাহরণটি দেখুন:
<html>
   <head>
      <title>VueJS content distribution</title>
     <script type = "text/javascript" src = "https://cdn.jsdelivr.net/npm/vue/dist/vue.js"></script>
    <style>
.demo-alert-box {
  padding: 10px 20px;
  background: #f3beb8;
  border: 1px solid #f09898;
}
</style>
   </head>
   <body>
      <div id="slots-demo">
         <alert-box>
            Something bad happened.
         </alert-box>
      </div>

      <script>
         Vue.component('alert-box', {
            template: `<div class="demo-alert-box">
                        <strong>Error!</strong>
                        <slot></slot>
                        </div>`
                     })

     new Vue({ el: '#slots-demo' })
      </script>
   </body>
</html>
Output
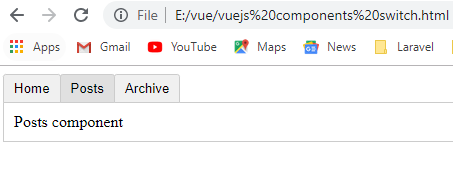
VueJS এ এক component থেকে অন্য components এ switch
<html>
   <head>
      <title>VueJS content distribution</title>
     <script type = "text/javascript" src = "https://cdn.jsdelivr.net/npm/vue/dist/vue.js"></script>
       <style>
.tab-button {
  padding: 6px 10px;
  border-top-left-radius: 3px;
  border-top-right-radius: 3px;
  border: 1px solid #ccc;
  cursor: pointer;
  background: #f0f0f0;
  margin-bottom: -1px;
  margin-right: -1px;
}
.tab-button:hover {
  background: #e0e0e0;
}
.tab-button.active {
  background: #e0e0e0;
}
.tab {
  border: 1px solid #ccc;
  padding: 10px;
}
</style>
   </head>
   <body>
<div id="dynamic-component-demo" class="demo">
  <button
    v-for="tab in tabs"
    v-bind:key="tab"
    v-bind:class="['tab-button', { active: currentTab === tab }]"
    v-on:click="currentTab = tab"
  >{{ tab }}</button>

  <component
    v-bind:is="currentTabComponent"
    class="tab"
  ></component>
</div>

     <script>
Vue.component('tab-home', {
   template: '<div>Home component</div>'
})
Vue.component('tab-posts', {
   template: '<div>Posts component</div>'
})
Vue.component('tab-archive', {
   template: '<div>Archive component</div>'
})

new Vue({
  el: '#dynamic-component-demo',
  data: {
    currentTab: 'Home',
    tabs: ['Home', 'Posts', 'Archive']
  },
  computed: {
    currentTabComponent: function () {
      return 'tab-' + this.currentTab.toLowerCase()
    }
  }
})
</script>
   </body>
</html>
Output
VueJS এ props কি?
VueJS এ props হচ্ছে properties শব্দের সক্ষিপ্ত রূপ। VueJS এ props এর মাধ্যমে যেকোনো parent component থেকে তার child component গুলোতে data pass করার একটা মাধ্যম। প্রথমে চলুন VueJS এ Component এর মধ্যে কিভাবে prop ডিফাইন করা হয় তা দেখা যাক:
<html>
   <head>
      <title>VueJs Props</title>
     <script type = "text/javascript" src = "https://cdn.jsdelivr.net/npm/vue/dist/vue.js"></script>
   </head>
   <body>
      <div id="students">
         <full-name name="Masud"></full-name>
   </div>
<br>

</div>
      <script>
     Vue.component('full-name', {
      props: ['name'],
      template: '<p>Hi {{ name}}!</p>'
   })
       new Vue({
         el: '#students'

      })
      </script>
   </body>
</html>
Output
Hi Masud
VueJS এ Props এর অনেক custom attributes থাকে, যেগুলোকে আপনি component register করতে পারেন। যখন কোনো value কোনো একটা attribute এ pass হয়, তখন এটি সেই component object এর একটা property হয়ে যায়। ধরুন আমরা blog posts component তৈরি করব। এখন যদি আমরা আমাদের blog post component এর জন্য কোনো title কে pass করতে চাই , তাহলে আমরা এই title কে props লিস্টে include করতে পারি নিম্নোক্ত props অপশনস গুলোর মাধমে :
Vue.component('blog-post', {
  props: ['title'],
  template: '<h3>{{ title }}</h3>'
})
একটা component এ আপনি যত বেশি ইচ্ছা আপনার চাহিদা অনুযায়ী props নিতে পারেন। যেকোনো value কে আপনি চাইলে যেকোনো props এ pass করতে পারেন। উপরের কোডের মধ্যে , template এ যেই value আছে , component instance এর মাধ্যমে তাতে আমরা access করতে পারব। অনেকটা data এর মতো।
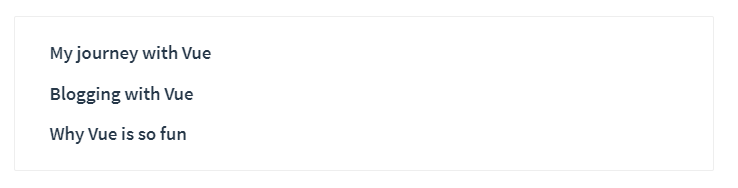
আর যখন prop registered হয়ে যাবে। তখন আপনি ডাটা কে তার custom attribute এ পাস করতে পারবেন। ঠিক নিচের কোডের মতো :
<blog-post title="My journey with Vue"></blog-post>
<blog-post title="Blogging with Vue"></blog-post>
<blog-post title="Why Vue is so fun"></blog-post>
এবার চলুন সম্পূর্ণ কোডটি একসাথে দেখা যাক:
<html>
   <head>
      <title>VueJs Form Input Bindings</title>
     <script type = "text/javascript" src = "https://cdn.jsdelivr.net/npm/vue/dist/vue.js"></script>
   </head>
   <body>
      <div id="blog-post-demo">
         <blog-post title="My journey with Vue"></blog-post>
         <blog-post title="Blogging with Vue"></blog-post>
         <blog-post title="Why Vue is so fun"></blog-post>
      </div>
<br>

</div>
      <script>
       Vue.component('blog-post', {
         props: ['title'],
         template: '<h3>{{ title }}</h3>'
      })
       new Vue({ el: '#blog-post-demo' })
      </script>
   </body>
</html>
Output
VueJS এ একাধিক props ডিফাইন
VueJS এ আপনি চাইলে একাধিক props ডিফাইন করতে পারেন। নিচের উদাহরণটি দেখুন:
<html>
   <head>
      <title>VueJs Multiple Props</title>
     <script type = "text/javascript" src = "https://cdn.jsdelivr.net/npm/vue/dist/vue.js"></script>
   </head>
   <body>
      <div id="students">
         <full-name first-name="Masud" last-name="Alam"></full-name>
         <full-name first-name="Sohel" last-name="Rana"></full-name>
   </div>
<br>

</div>
      <script>
     Vue.component('full-name', {
      props: ['first-name','last-name'],
      template: '<p>Hi {{ firstName }} {{lastName}}!</p>'
   })
       new Vue({
         el: '#students'

      })
      </script>
   </body>
</html>
Output
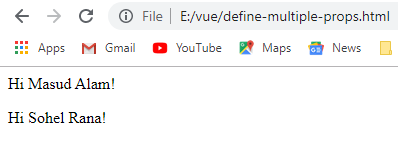
Masud Alam
আমি মাসুদ আলম, বাংলাদেশের ৩৬ তম Zend Certified Engineer । ২০০৯ সালে কম্পিউটার সাইন্স থেকে বেচেলর ডিগ্রী অর্জন করি। দীর্ঘ ১৫ বছর আমি Winux Soft, SSL Wireless, IBCS-PRIMAX, Max Group, Canadian International Development Agency (CIDA), Care Bangladesh, World Vision, Hellen Keller, Amarbebsha Ltd সহ বিভিন্ন দেশি বিদেশী কোম্পানিতে ডেটা সাইন্স, মেশিন লার্নিং, বিগ ডেটা, ওয়েব ডেভেলপমেন্ট এবং সফটওয়্যার ডেভেলপমেন্ট এর উপর বিভিন্ন লিডিং পজিশন এ চাকরি এবং প্রজেক্ট লিড করি। এছাড়াও বাংলাদেশের ১৮৫ জন জেন্ড সার্টিফাইড ইঞ্জিনিয়ার এর মধ্যে ১২০ এরও অধিক ছাত্র আমার হাতে জেন্ড সার্টিফাইড ইঞ্জিনিয়ার হয়েছেন। বর্তমানে w3programmers ট্রেনিং ইনস্টিটিউট এ PHP এর উপর Professional এবং Advance Zend Certified PHP -8.2 Engineering, Laravel Mastering Course with ReactJS, Python Beginning To Advance with Blockchain, Machine Learning and Data Science, Professional WordPress Plugin Development Beginning to Advance কোর্স করাই। আর অবসর সময়ে w3programmers.com এ ওয়েব টেকনোলজি নিয়ে লেখালেখি করি।