Laravel Database Management
LARAVEL DATABASE PART-3: Laravel CRUD with SQLite

SQLite কি?
SQLite হল একটি স্বয়ংসম্পূর্ণ, যার মানে কোন বাহ্যিক নির্ভরতা নেই। transactional SQL database engine যা জিরো-কনফিগার করা হয়েছে, যার মানে অন্যান্য ডাটাবেসের মতো আপনার সিস্টেমে এটি কনফিগার করার প্রয়োজন নেই। এছাড়াও এটি একটি সার্ভারলেস সিস্টেম , যার মানে এটিকে অন্যান্য ডাটাবেসের মতো কোনো ধরণের সার্ভার এনভায়রনমেন্ট দেওয়ার দরকার নেই। এটি খুব ছোট এবং হালকা ওজনের, সম্পূর্ণ কনফিগার করার পর এটি 400 KiB বা এর কম বা optional feature গুলো বাদ দিয়ে 250 KiB-এর কম সাইজ হয়ে থাকে ।
SQLite ইঞ্জিন অন্যান্য ডাটাবেসের মতো standalone নয়, আপনি এটিকে আপনার application এর সাথে আপনার প্রয়োজন অনুযায়ী statically বা dynamically লিঙ্ক করতে পারেন। একটি সম্পূর্ণ SQLite ডাটাবেস তার ডেটা গুলো একটি একক ক্রস-প্ল্যাটফর্ম ডিস্ক ফাইলে সংরক্ষণ করে। SQLite তার স্টোরেজ ফাইলে multiple process গুলো অথবা thread গুলো থেকে নিরাপদ অ্যাক্সেস এর সুবিধা প্রদান করে।
২০০০ সালে D. Richard Hipp এটি প্রথম ডিজাইন করেন।
কিভাবে Laravel Framework এ SQLite Database কানেক্ট করবেন ?
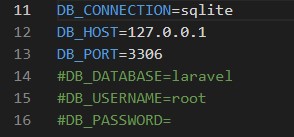
Laravel Framework এ SQLite Database কানেক্ট করতে হলে , আপনার .env File এ নিচের মতো পরিবর্তন করে নিন :
Create Migration
যদি আপনার Database তৈরি থাকে এবং .env ফাইলে ডাটাবেস কংনেক্টিভিটি ঠিক থাকে , তাহলে নিম্নোক্ত কমান্ডের মাধ্যমে আপনি একটা Product migration File তৈরি করতে পারেন।
1 | php artisan make:migration create_products_table |
এখন আপনি নিচের ছবির মতো একটা Migration File তৈরির মেসেজ দেখতে পাবেন।

এখন আপনার /database/migrations folder এ অবস্থিত নতুন xxx_create_products_table.php Migration ফাইলে নিচের মতো করে আপডেট করে নেন।
01 02 03 04 05 06 07 08 09 10 11 12 13 14 15 16 17 18 19 20 21 22 23 24 25 26 27 28 29 30 31 32 33 34 | <?phpuse Illuminate\Database\Migrations\Migration;use Illuminate\Database\Schema\Blueprint;use Illuminate\Support\Facades\Schema;return new class extends Migration{ /** * Run the migrations. * * @return void */ public function up() { Schema::create('products', function (Blueprint $table) { $table->id(); $table->string('name', 50); $table->text('detail')->nullable(); $table->string('image', 155); $table->timestamps(); }); } /** * Reverse the migrations. * * @return void */ public function down() { Schema::dropIfExists('products'); }}; |
Run Migration
এবার আপনার টার্মিনালে ফিরে যান এবং এই কমান্ডটি চালান।
1 | php artisan migrate |
Migration টি কমপ্লিট হয়ে যাওয়া মানে , আপনার লারাভেল SQLite ডাটাবেস ব্যবহারের জন্য সম্পূর্ণ প্রস্তুত।
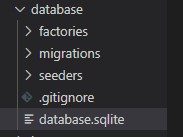
এখন, আপনার Laravel project directory এর Database folder এর মধ্যে database.sqlite নামে একটি ফাইল তৈরি করুন।
Create Product Model
এবার আমরা Product Model টি তৈরি করব। টার্মিনালে ফিরে যান এবং এই কমান্ডটি চালান।
1 | php artisan make:model Product |
উপরের কম্যান্ড টি আপনার /app/Models ফোল্ডারের ভিতরে Product.php নামে একটা মডেল ফাইল তৈরি করবে। ফাইলটি খুলুন এবং নিচের মতো করে আপডেট করে নিন।
01 02 03 04 05 06 07 08 09 10 11 12 13 14 | <?phpnamespace App\Models;use Illuminate\Database\Eloquent\Factories\HasFactory;use Illuminate\Database\Eloquent\Model;class Product extends Model{ use HasFactory; protected $fillable = [ 'name', 'detail', 'image' ];} |
Create Controller
এবার আমরা productController নামে একটা Resource Controller তৈরি করব এবং Resource Controller এর সাথে আমাদের Product Model কে বাইন্ড করে দিবো। যেন আমরা খুব সহজে আমাদের ডাটাবেস টেবিল কে ম্যানেজ করতে পারি। আপনার টার্মিনালে ফিরে যান এবং এই কমান্ডটি চালান।
1 | php artisan make:controller ProductController --resource --model=Product |
এখন আপনি /app/Http/Controllers ফোল্ডারে ProductController.php নামে একটা ফাইল পাবেন। এবং একটা কমপ্লিট CRUD Operation পরিচালনা করার জন্য যেই যেই মেথড দরকার সবগুলো তৈরি অবস্থায় পাবেন। ঠিক নিম্নরূপ :
01 02 03 04 05 06 07 08 09 10 11 12 13 14 15 16 17 18 19 20 21 22 23 24 25 26 27 28 29 30 31 32 33 34 35 36 37 38 39 40 41 42 43 44 45 46 47 48 49 50 51 52 53 54 55 56 57 58 59 60 61 62 63 64 65 66 67 68 69 70 71 72 73 74 75 76 77 78 79 80 81 82 83 84 85 | <?phpnamespace App\Http\Controllers;use App\Models\Product;use Illuminate\Http\Request;class ProductController extends Controller{ /** * Display a listing of the resource. * * @return \Illuminate\Http\Response */ public function index() { // } /** * Show the form for creating a new resource. * * @return \Illuminate\Http\Response */ public function create() { // } /** * Store a newly created resource in storage. * * @param \Illuminate\Http\Request $request * @return \Illuminate\Http\Response */ public function store(Request $request) { // } /** * Display the specified resource. * * @param \App\Models\Product $product * @return \Illuminate\Http\Response */ public function show(Product $product) { // } /** * Show the form for editing the specified resource. * * @param \App\Models\Product $product * @return \Illuminate\Http\Response */ public function edit(Product $product) { // } /** * Update the specified resource in storage. * * @param \Illuminate\Http\Request $request * @param \App\Models\Product $product * @return \Illuminate\Http\Response */ public function update(Request $request, Product $product) { // } /** * Remove the specified resource from storage. * * @param \App\Models\Product $product * @return \Illuminate\Http\Response */ public function destroy(Product $product) { // }} |
উপরের কোডে মূলতঃ আমাদের এই Method গুলি রয়েছে
- index() এই মেথড দিয়ে আমরা সবগুলো প্রোডাক্ট টেবুলাইজ আকারে দেখাবো।
- create() এইটা দিয়ে মূলতঃ আমরা নতুন প্রোডাক্ট তৈরির ফর্মটি শো করব। store() এইটা দিয়ে আমরা মূলতঃ ডাটাবেসে প্রোডাক্ট ইনফরমেশন সংরক্ষণ করব।
- show() একটা নির্দিষ্ট প্রোডাক্টের বিস্তারিত প্রদর্শনের জন্য এই মেথড ব্যবহার করব।
- edit() এই মেথড দিয়ে একটা নির্দিষ্ট প্রোডাক্ট এডিট করার সুবিধা যুক্ত করব। বা Edit ফর্ম টি এই মেথড দিয়ে আমরা প্রদর্শন করব।
- update() এই মেথড দিয়ে একটা নির্দিষ্ট প্রোডাক্টের ডাটাবেস আপডেটের কাজটি করব।
- destroy() এই মেথড দিয়ে একটা নির্দিষ্ট প্রোডাক্ট কে ডিলিট এর কাজটি করব।
Create Master Template
প্রথমে আমরা একটা Master Template তৈরি করব। যার অধীনে আমরা আমাদের CRUD এর সবগুলো template শো করব। এর জন্য আমরা /resources/views/products ফোল্ডারের মধ্যে layout.blade.php নামে Master Template ফাইলটি তৈরি করব। নিম্নে layout.blade.php নামে Master Template ফাইলের কোড দেওয়া হলো:
01 02 03 04 05 06 07 08 09 10 11 12 13 14 15 16 17 | <!DOCTYPE html><html><head> <title>Laravel 9 CRUD Application with Image Upload</title> <link href="https://cdn.jsdelivr.net/npm/bootstrap@5.0.2/dist/css/bootstrap.min.css" rel="stylesheet"></head><body> <div class="container"> @yield('content') </div></body></html> |
Add Create Child Template
এখন আমরা প্রোডাক্ট তৈরির জন্য create.blade.php নামে একটা চাইল্ড টেম্পলেট তৈরী করব , যা Master Template layout.blade.php ফাইল থেকে বর্ধিত হবে।
01 02 03 04 05 06 07 08 09 10 11 12 13 14 15 16 17 18 19 20 21 22 23 24 25 26 27 28 29 30 31 32 33 34 35 36 37 38 39 40 41 42 43 44 45 46 47 48 49 50 51 52 53 54 | @extends('products.layout')@section('content') <div class="row" style="margin-top: 20px;"> <div class="col-lg-12 margin-tb"> <div style="text-align: center;"> <h4>Add New Product</h4> </div> <div class="pull-right"> <a class="btn btn-primary" href="{{ route('products.index') }}"> Back</a> </div> </div> </div> @if ($errors->any()) <div class="alert alert-danger"> <strong>Whoops!</strong> There were some problems with your input.<br><br> <ul> @foreach ($errors->all() as $error) <li>{{ $error }}</li> @endforeach </ul> </div> @endif <form action="{{ route('products.store') }}" method="POST" enctype="multipart/form-data" style="margin-top: 20px;"> @csrf <div class="row"> <div class="col-xs-12 col-sm-12 col-md-12"> <div class="form-group"> <strong>Name:</strong> <input type="text" name="name" class="form-control" placeholder="Name"> </div> </div> <div class="col-xs-12 col-sm-12 col-md-12"> <div class="form-group"> <strong>Detail:</strong> <textarea class="form-control" style="height:150px" name="detail" placeholder="Detail"></textarea> </div> </div> <div class="col-xs-12 col-sm-12 col-md-12"> <div class="form-group"> <strong>Image:</strong> <input type="file" name="image" class="form-control" placeholder="image"> </div> </div> <div class="col-xs-12 col-sm-12 col-md-12" style="margin-top: 20px;"> <button type="submit" class="btn btn-primary">Submit</button> </div> </div> </form>@endsection |
Show Create Form
Insert করার জন্য তো ফর্ম হয়ে গেলো। এখন এই ফর্মকে কন্ট্রোলার দিয়ে দেখানোর পালা। এর জন্য আমাদেরকে ProductController এর create() method এ নিচের মতো করে আপডেট করে দিতে হবে।
1 2 3 4 5 6 7 8 9 | /** * Show the form for creating a new resource. * * @return \Illuminate\Http\Response */ public function create() { return view('products.create'); } |
Store Data to Database
এবার আমরা create.blade.php দিয়ে নেওয়া ডাটা গুলোকে ProductController এর store() Method ব্যবহার করে ডাটাবেসে সংরক্ষণের ব্যবস্থা করব। চলুন শুরু করা যাক :
01 02 03 04 05 06 07 08 09 10 11 12 13 14 15 16 17 18 19 20 21 22 23 24 25 26 | /** * Store a newly created resource in storage. * * @param \Illuminate\Http\Request $request * @return \Illuminate\Http\Response */ public function store(Request $request) { $request->validate([ 'name'=>'required', 'detail'=>'required', 'image'=>'required|image|mimes:jpeg,png,jpg,giv,svg|max:2048', ]); $input=$request->all(); if($image=$request->file('image')){ $destinationPath="images/"; $profileImage=date('YmdHis').".".$image->getClientOriginalExtension(); $image->move($destinationPath,$profileImage); $input['image']="$profileImage"; } Product::create($input); /*return redirect()->route('products.index') ->with('success', 'Product created successfully.');*/ return "Product Created Successfully"; } |
৯-১৩ নম্বর লাইনে আমরা মূলতঃ আমাদের ফরমের ডাটা গুলো ভ্যালিডেশন এর কাজগুলো করেছি। আর ১৪ নম্বর লাইনে ডাটা গুলোকে $input নামের একটা variable এ সংরক্ষণের ব্যবস্থা করি। এবং ১৫-২০ নম্বর লাইনে আমরা আমাদের আপলোডকৃত ইমেজ একটা ফোল্ডারে সংরক্ষণের ব্যবস্থা করি। সর্বশেষ ২২ নম্বর লাইনে আমরা আমাদের Product নামক Model ব্যবহার করে , ডাটাগুলোকে ডাটাবেসে সংরক্ষণের ব্যবস্থা করি। ২৩ এবং ২৪ নম্বর লাইনে একটা Product successfully Insert হওয়ার পর কোন পেজে redirect হবে , সেই কাজটুকু করি। তবে যেহেতু আমার এখনো product list পেজ তৈরী করিনাই। তাই আপাতত আমি এই ২ লাইন কমেন্ট দিয়ে hide করে রাখলাম। এবং ২৫ নম্বর লাইনে একটা সাধারণ মেসেজ দিয়ে রাখলাম। যা পরবর্তীতে আমরা রিমুভ করে দিবো।
Add Route
Resource Controller ব্যবহার করে Data Insert করার জন্য যা যা করার দরকার তার সবই হলো। এবার আমাদেরকে Route File web.php ফাইলে ProductController কে নিচের মতো করে যুক্ত করে দিতে হবে।
1 2 3 | use App\Http\Controllers\ProductController;Route::resource('products', ProductController::class); |
এখন যদি আপনি আপনার ব্রাউজারে URL http://localhost:8000/products/create দিয়ে হিট করেন , তাহলে নিচের মতো create form দেখতে পাবেন।
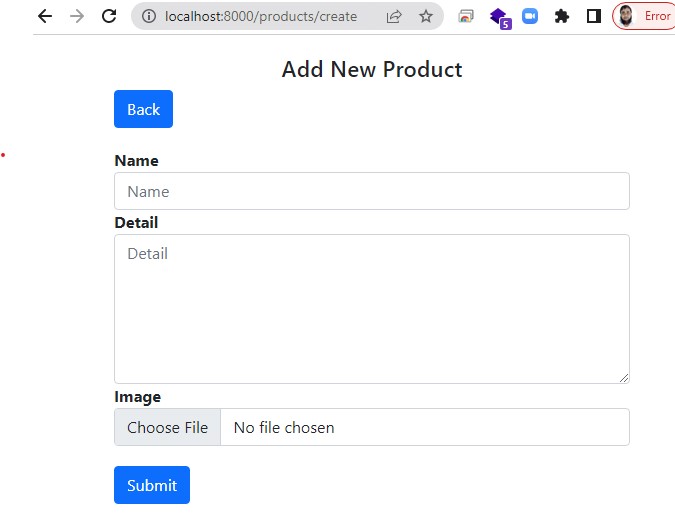
এখন এই ফর্ম টি সাবমিট করে আপনি আপনার ডাটাবেসে ডাটা store করতে পারবেন।
https://blog.w3programmers.com/mastering-laravel-with-reactjs-course/
Add List Child Template
এখন আমরা প্রোডাক্টগুলো প্রদর্শনের জন্য index.blade.php নামে একটা চাইল্ড টেম্পলেট তৈরী করব , যা Master Template layout.blade.php ফাইল থেকে বর্ধিত হবে।
index.blade.php খুলুন এবং এটিতে নিম্নোক্ত কোড লিখুন।
01 02 03 04 05 06 07 08 09 10 11 12 13 14 15 16 17 18 19 20 21 22 23 24 25 26 27 28 29 30 31 32 33 34 35 36 37 38 39 40 41 42 43 44 45 46 47 48 49 50 51 52 53 54 55 56 57 | @extends('products.layout')@section('content') <div class="row" style="margin-top: 20px;"> <div class="col-lg-12 margin-tb"> <div style="text-align: center;"> <h4>Laravel 9 CRUD Application with Image Upload</h4> </div> <div class="pull-right"> <a class="btn btn-success" href="{{ route('products.create') }}"> Add New Product </a> </div> </div> </div> <br> @if ($message = Session::get('success')) <div class="alert alert-success"> <p>{{ $message }}</p> </div> @endif <table class="table table-bordered" style="margin-top: 20px;"> <tr> <th>No</th> <th>Name</th> <th>Details</th> <th>Image</th> <th width="280px">Action</th> </tr> @foreach ($products as $product) <tr> <td>{{ ++$i }}</td> <td>{{ $product->name }}</td> <td>{{ $product->detail }}</td> <td><img src="/images/{{ $product->image }}" width="100px"></td> <td> <form action="{{ route('products.destroy', $product->id) }}" method="POST"> <a class="btn btn-info" href="{{ route('products.show', $product->id) }}">Show</a> <a class="btn btn-primary" href="{{ route('products.edit', $product->id) }}">Edit</a> @csrf @method('DELETE') <button type="submit" class="btn btn-danger">Delete</button> </form> </td> </tr> @endforeach </table> {!! $products->links() !!}@endsection |
Show Product List
Product List দেখানোর জন্য তো টেবিল হয়ে গেলো। এখন এই টেবিলকে কন্ট্রোলার দিয়ে দেখানো এবং ডাটাবেস থেকে প্রোডাক্ট লিস্ট নিয়ে আসার জন্য আমাদেরকে ProductController এর index() method এ নিচের মতো করে আপডেট করে দিতে হবে।
01 02 03 04 05 06 07 08 09 10 11 12 | /** * Display a listing of the resource. * * @return \Illuminate\Http\Response */ public function index() { $products = Product::latest()->paginate(5); return view('products.index', compact('products')) ->with('i', (request()->input('page', 1) - 1) * 5); } |
একটু ব্যাখ্যা করা যাক , এখানে মূলতঃ আমরা ৮ নম্বর লাইনে আমাদের Product Model ব্যবহার করে ডাটাবেসের products টেবিল থেকে আমাদের সর্বশেষ insert হওয়া ৫ টি প্রোডাক্ট রো নিয়ে আসি। এবং ১০ ও ১১ নম্বর লাইনে প্রোডাক্ট ইনফরমেশন গুলো index.blade.php file এ পাঠানোর ব্যবস্থা করি।
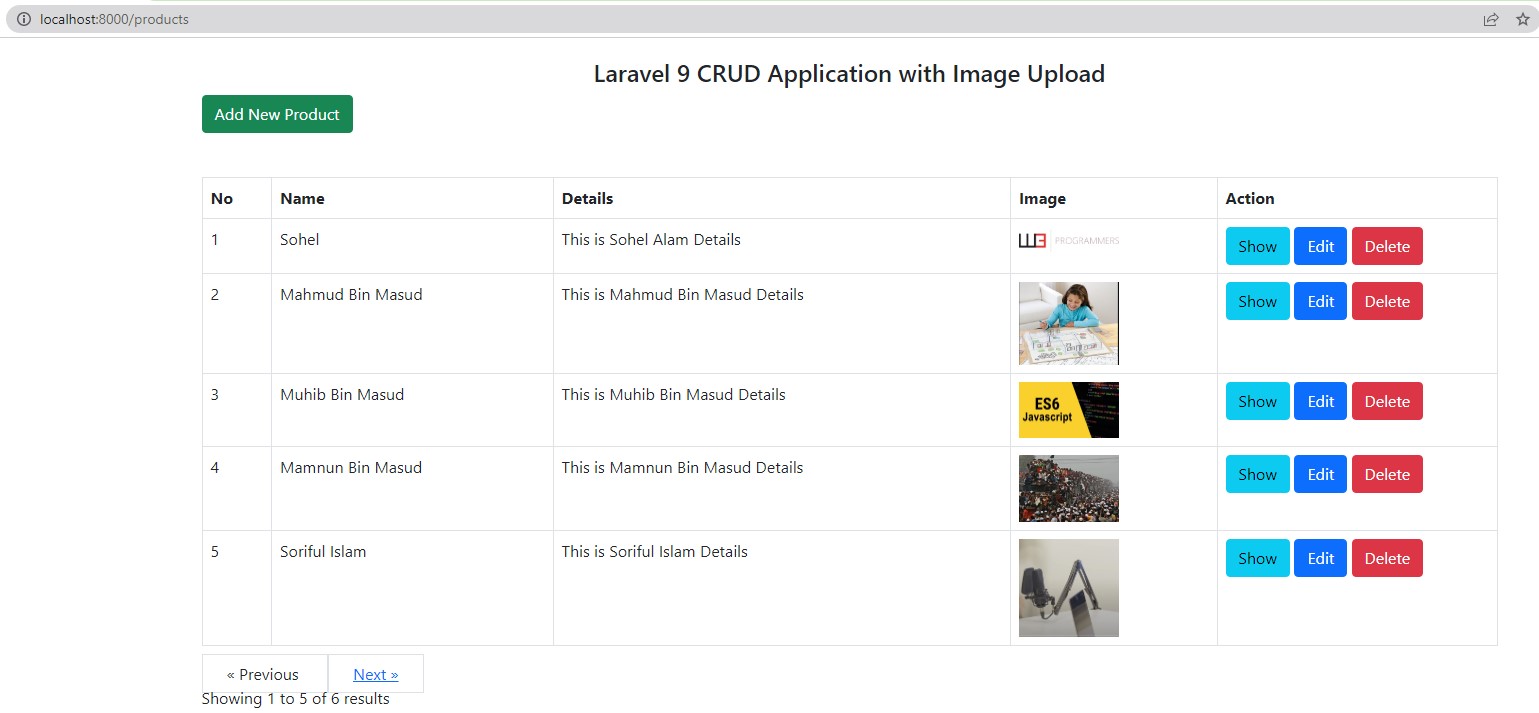
এখন যদি আপনি আপনার ব্রাউজারে http://localhost:8000/products দিয়ে হিট করেন , তাহলে নিচের মতো Product List দেখতে পাবেন।
Add Edit Child Template
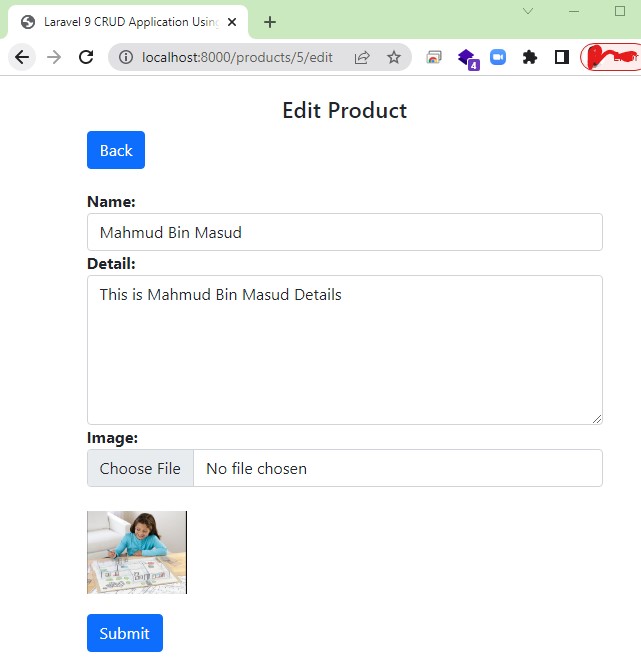
এখন আমরা আমাদের প্রোডাক্ট গুলোর মধ্যে একটা নির্দিষ্ট Product কে Edit করার জন্য edit.blade.php নামে একটা চাইল্ড টেম্পলেট তৈরী করব , যা Master Template layout.blade.php ফাইল থেকে বর্ধিত হবে।
01 02 03 04 05 06 07 08 09 10 11 12 13 14 15 16 17 18 19 20 21 22 23 24 25 26 27 28 29 30 31 32 33 34 35 36 37 38 39 40 41 42 43 44 45 46 47 48 49 50 51 52 53 54 55 56 57 58 59 | @extends('products.layout')@section('content') <div class="row" style="margin-top: 20px;"> <div class="col-lg-12 margin-tb"> <div style="text-align: center;"> <h4>Edit Product</h4> </div> <div class="pull-right"> <a class="btn btn-primary" href="{{ route('products.index') }}"> Back</a> </div> </div> </div> @if ($errors->any()) <div class="alert alert-danger"> <strong>Whoops!</strong> There were some problems with your input.<br><br> <ul> @foreach ($errors->all() as $error) <li>{{ $error }}</li> @endforeach </ul> </div> @endif <form action="{{ route('products.update', $product->id) }}" method="POST" enctype="multipart/form-data" style="margin-top: 20px;"> @csrf @method('PUT') <div class="row"> <div class="col-xs-12 col-sm-12 col-md-12"> <div class="form-group"> <strong>Name:</strong> <input type="text" name="name" value="{{ $product->name }}" class="form-control" placeholder="Name"> </div> </div> <div class="col-xs-12 col-sm-12 col-md-12"> <div class="form-group"> <strong>Detail:</strong> <textarea class="form-control" style="height:150px" name="detail" placeholder="Detail">{{ $product->detail }}</textarea> </div> </div> <div class="col-xs-12 col-sm-12 col-md-12"> <div class="form-group"> <strong>Image:</strong> <input type="file" name="image" class="form-control" placeholder="image"> <br> <img src="/images/{{ $product->image }}" width="100px"> </div> </div> <div class="col-xs-12 col-sm-12 col-md-12" style="margin-top: 20px;"> <button type="submit" class="btn btn-primary">Submit</button> </div> </div> </form>@endsection |
Show Edit Form
Edit করার জন্য তো ফর্ম হয়ে গেলো। এখন এই ফর্মকে কন্ট্রোলার দিয়ে দেখানোর পালা। এর জন্য আমাদেরকে ProductController এর edit() method এ নিচের মতো করে আপডেট করে দিতে হবে।
01 02 03 04 05 06 07 08 09 10 | /** * Show the form for editing the specified resource. * * @param \App\Product $product * @return \Illuminate\Http\Response */ public function edit(Product $product) { return view('products.edit', compact('product')); } |
এখন যদি আপনি আপনার ব্রাউজারে Edit Button এ হিট করেন , তাহলে নিচের মতো Edit form দেখতে পাবেন।
https://blog.w3programmers.com/mastering-laravel-with-reactjs-course/
Update Data to Database
এবার আমরা edit.blade.php দিয়ে নেওয়া ডাটা গুলোকে ProductController এর update() Method ব্যবহার করে ডাটাবেসে update এর ব্যবস্থা করব। চলুন শুরু করা যাক :
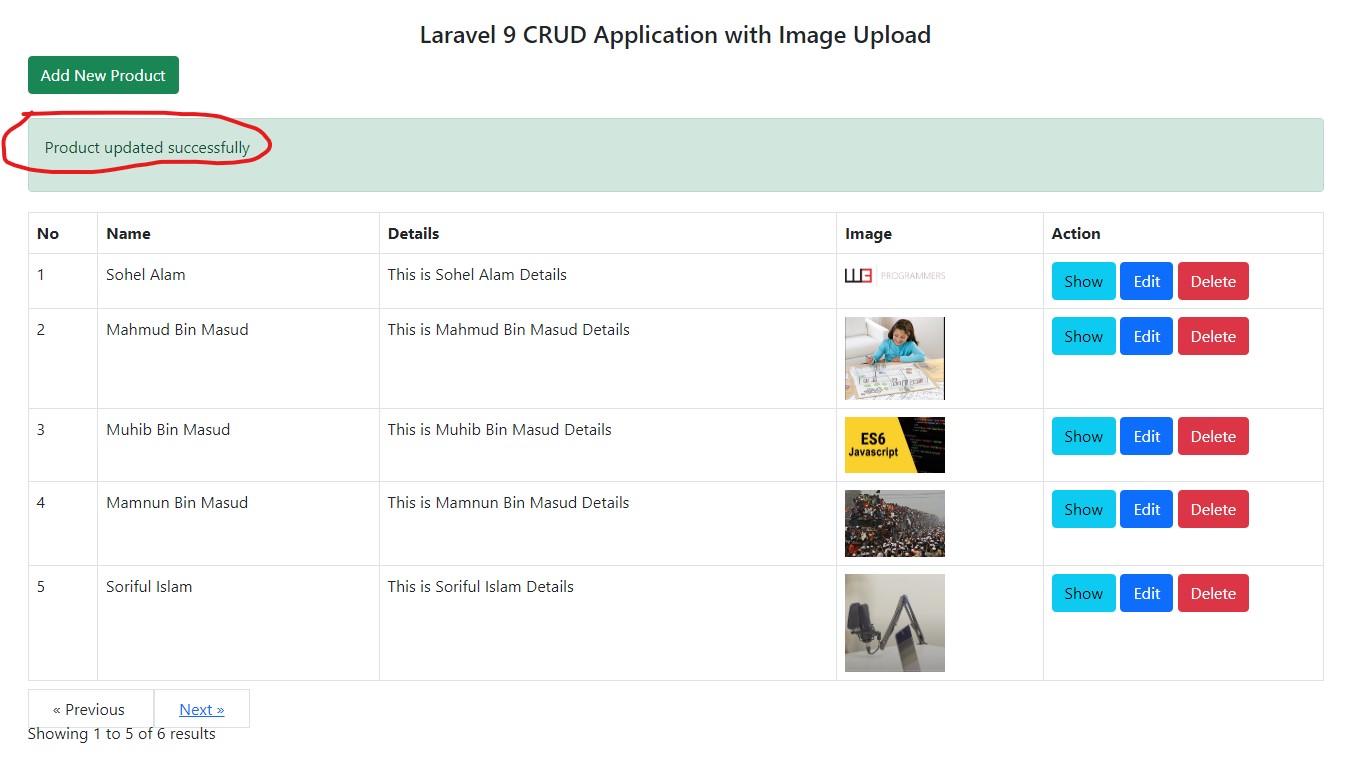
01 02 03 04 05 06 07 08 09 10 11 12 13 14 15 16 17 18 19 20 21 22 23 24 25 26 27 28 29 30 | /** * Update the specified resource in storage. * * @param \Illuminate\Http\Request $request * @param \App\Product $product * @return \Illuminate\Http\Response */ public function update(Request $request, Product $product) { $request->validate([ 'name' => 'required', 'detail' => 'required' ]); $input = $request->all(); if ($image = $request->file('image')) { $destinationPath = 'images/'; $profileImage = date('YmdHis') . "." . $image->getClientOriginalExtension(); $image->move($destinationPath, $profileImage); $input['image'] = "$profileImage"; } else { unset($input['image']); } $product->update($input); return redirect()->route('products.index') ->with('success', 'Product updated successfully'); } |
এখন আপনি যখন একটা প্রোডাক্ট Update করবেন , তখন নিচের মতো আপডেট মেসেজ দেখতে পাবেন।
Show Product Details
এবার আমরা একটা নির্দিষ্ট Product এর details প্রদর্শনের ব্যবস্থা করব। এর জন্য প্রথমে আমরা show.blade.php নামে একটা চাইল্ড টেম্পলেট তৈরী করব , যা Master Template layout.blade.php ফাইল থেকে বর্ধিত হবে।
01 02 03 04 05 06 07 08 09 10 11 12 13 14 15 16 17 18 19 20 21 22 23 24 25 26 27 28 29 30 31 32 33 34 35 | @extends('products.layout')@section('content') <div class="row" style="margin-top: 20px;"> <div class="col-lg-12 margin-tb"> <div style="text-align: center;"> <h4>Show Product</h4> </div> <div class="pull-right"> <a class="btn btn-primary" href="{{ route('products.index') }}"> Back</a> </div> </div> </div> <div class="row" style="margin-top: 20px;text-align: center;"> <div class="col-xs-12 col-sm-12 col-md-12"> <div class="form-group"> <strong>Name:</strong><br> {{ $product->name }} </div> </div> <div class="col-xs-12 col-sm-12 col-md-12" style="margin-top: 20px;"> <div class="form-group"> <strong>Details:</strong><br> {{ $product->detail }} </div> </div> <div class="col-xs-12 col-sm-12 col-md-12" style="margin-top: 20px;"> <div class="form-group"> <strong>Image:</strong><br> <img src="/images/{{ $product->image }}" width="200px"> </div> </div> </div>@endsection |
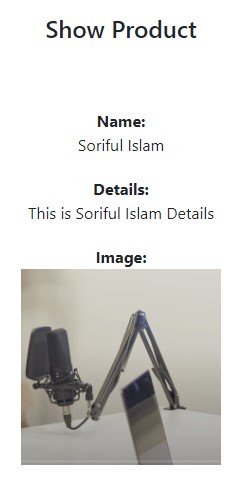
Product details দেখানোর জন্য তো show.blade.php File তৈরি হয়ে গেলো। এখন এই টেবিল থেকে নির্দিষ্ট রো নিয়ে আসার জন্য আমাদেরকে ProductController এর show() method এ নিচের মতো করে আপডেট করে দিতে হবে।
01 02 03 04 05 06 07 08 09 10 | /** * Display the specified resource. * * @param \App\Product $product * @return \Illuminate\Http\Response */ public function show(Product $product) { return view('product.show', compact('product')); } |
এখন যদি আপনি প্রোডাক্ট লিস্টের show বাটনে ক্লিক করেন , তাহলে নিচের মতো আউটপুট দেখতে পাবেন।
Delete Product
সবতো হলো , এইবার Delete এর কাজ। এর জন্য আপনাকে ProductController এর destroy() Method এ নিচের মতো পরিবর্তন করে দিতে হবে।
01 02 03 04 05 06 07 08 09 10 11 12 13 | /** * Remove the specified resource from storage. * * @param \App\Product $product * @return \Illuminate\Http\Response */ public function destroy(Product $product) { $product->delete(); return redirect()->route('products.index') ->with('success', 'Product deleted successfully'); } |
ব্যাস হয়ে গেল , এবার আপনি Delete Button এ ক্লিক করলেই দেখতে পাবেন , আপনার প্রোডাক্টটি ডিলিট হয়েগেছে।
Masud Alam
আমি মাসুদ আলম, বাংলাদেশের ৩৬ তম Zend Certified Engineer । ২০০৯ সালে কম্পিউটার সাইন্স থেকে বেচেলর ডিগ্রী অর্জন করি। দীর্ঘ ১৫ বছর আমি Winux Soft, SSL Wireless, IBCS-PRIMAX, Max Group, Canadian International Development Agency (CIDA), Care Bangladesh, World Vision, Hellen Keller, Amarbebsha Ltd সহ বিভিন্ন দেশি বিদেশী কোম্পানিতে ডেটা সাইন্স, মেশিন লার্নিং, বিগ ডেটা, ওয়েব ডেভেলপমেন্ট এবং সফটওয়্যার ডেভেলপমেন্ট এর উপর বিভিন্ন লিডিং পজিশন এ চাকরি এবং প্রজেক্ট লিড করি। এছাড়াও বাংলাদেশের ১৮৫ জন জেন্ড সার্টিফাইড ইঞ্জিনিয়ার এর মধ্যে ১২০ এরও অধিক ছাত্র আমার হাতে জেন্ড সার্টিফাইড ইঞ্জিনিয়ার হয়েছেন। বর্তমানে w3programmers ট্রেনিং ইনস্টিটিউট এ PHP এর উপর Professional এবং Advance Zend Certified PHP -8.2 Engineering, Laravel Mastering Course with ReactJS, Python Beginning To Advance with Blockchain, Machine Learning and Data Science, Professional WordPress Plugin Development Beginning to Advance কোর্স করাই। আর অবসর সময়ে w3programmers.com এ ওয়েব টেকনোলজি নিয়ে লেখালেখি করি।