Wordpress Theme Development
WordPress Theme Development in Bangla Part-5: WordPress Sidebar Customization
WordPress Theme Development এর পঞ্চম পর্বে আপনাকে স্বাগতম! আজকের পর্বে আমরা দেখবো কিভাবে একটা WordPress sidebar কে customize অর্থাৎ নিজের পছন্দ মতো ডিজাইন apply করা যায়। একই সাথে WordPress এর বিভিন্ন সুবিধা যেমন- category list, popular post list, recent post list, archive list, calendar, Search Box সহ আরো অনেক feature কে নিজের theme এর ডিজাইন দিয়ে sidebar এ প্রদর্শন করা যায়। তো চলুন শুরু করা যাক :
Category List Customization:
এখানে প্রথমে আমরা দেখবো কিভাবে আমাদের WordPress এর category list কে নিজেদের মতো করে sidebar এ প্রদর্শন করা যায়। তার আগে দেখা যাক , আমাদের Category List দেখতে কেমন হবে :
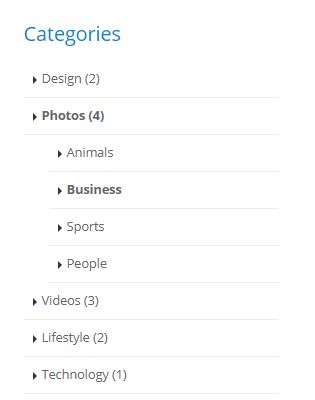
এবার চলুন আমরা কিছু স্যাম্পল category List তৈরী করে ফেলি :
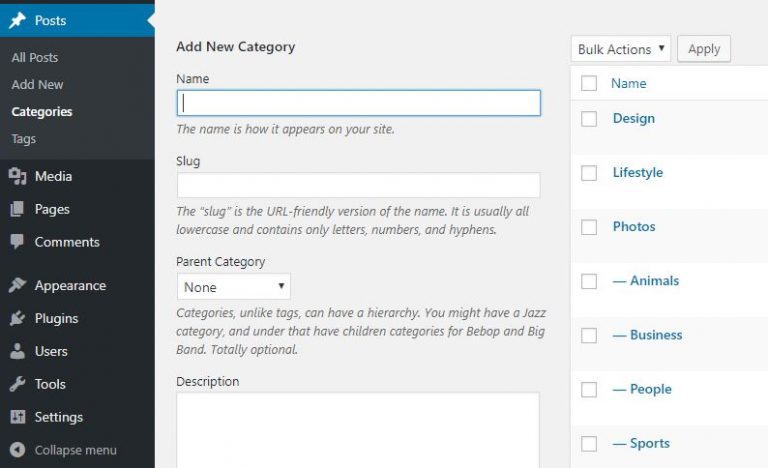
WordPress এ নতুন কোনো Category তৈরী করতে হলে আপনাকে WordPress Dashboard এর Post =>Categories Menu তে গিয়ে নতুন Category তৈরী করতে হবে। নিচের ছবিটি লক্ষ্য করুন:
এবার আপনার wordpress template এর static category list এর <ul> </ul> tag এর মধ্যে অবস্থিত <li> </li> স্যাম্পল ক্যাটাগরি গুলো ফেলে দিয়ে নিচের কোডটুকু লিখুন :
1 2 3 4 5 6 7 8 9 | <ul class="nav nav-list flex-column mb-6"><?php $args = array( 'orderby' => 'name', 'order' => 'ASC', 'title_li' => '<h4 class="heading-primary">Categories</h4>');wp_list_categories($args);</ul> |
এখন আপনি আপনার theme এর sidebar ঠিক নিচের মতো দেখতে পাবেন :
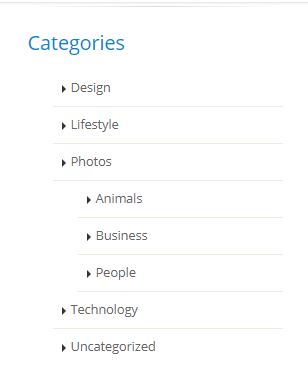
ব্যাখ্যা: এখানে আমরা আমাদের সাইটের category list প্রদর্শনের জন্য wordpress এর category show করার ফাঙ্কশন wp_list_categories( string|array $args = “” ) টি ব্যবহার করি। এবং প্রয়োজনীয় আর্গুমেন্ট গুলোকে array আকারে দেই।
wp_list_categories() function এর সব argument গুলোর বিস্তারিত এখানে পাবেন।
Search Form Customization:
এখন আমরা দেখবো কিভাবে আমাদের WordPress এর search form কে নিজেদের মতো করে sidebar এ প্রদর্শন করা যায়। তার আগে দেখা যাক , আমাদের search form দেখতে কেমন হবে :
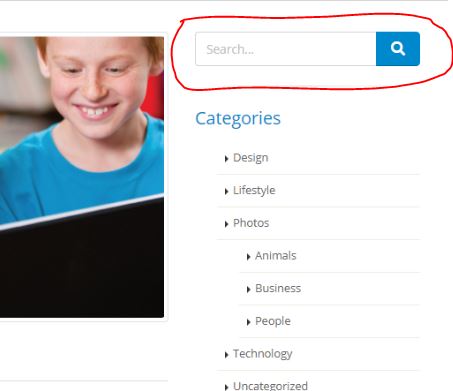
এখন আমরা শুধু আমাদের bootstrap search form টি কে wordpressify করব। আর এর জন্য আপনার bootstrap ফর্ম এর দুটি জায়গায় পরিবর্তন আনতে হবে। প্রথমটি হচ্ছে form action আর দ্বিতীয়টি হচ্ছে search input field এ। তো চলুন পরিবর্তন টা দেখা যাক :
1 2 3 4 5 6 7 8 | <form action="<?php echo site_url('/'); ?>" method="get"><div class="input-group input-group-4"><input class="form-control" placeholder="Search..." name="search" id="s" type="text" value="<?php the_search_query();?>"><span class="input-group-append"><button type="submit" class="btn btn-primary btn-lg"><i class="fas fa-search"></i></button></span></div></form> |
ব্যাখ্যা: এখানে আমরা আমাদের সাইটের search form কে WordPressify করার জন্য search form এর action এ site_url(‘/’) function টি ব্যবহার করি, যেন search টি home পেজ এ দেখায় আর search value কে নেওয়ার জন্য search input field এর value তে the_search_query() function টি ব্যবহার করি ।
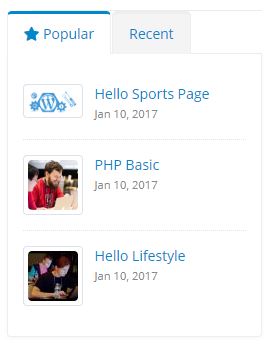
Recent Post এবং Popular Post Customization:
প্রথমে দেখা যাক আমাদের Recent post এবং Popular post দেখতে কেমন হবে?
এখন screen short অনুযায়ী আমরা যদি wordpressify করতে চাই , তাহলে আপনাকে নিম্নের কাজ গুলো আগে করতে হবে।
-
১. প্রত্যেকটি post এ আপনাকে অবশ্যই featured image অন্তর্ভুক্ত করতে হবে।
২. Popular Post দেখানোর জন্য কিছু article কে browser এর private mode এ গিয়ে কয়েকবার ব্রাউজ করতে হবে।
৩. functions.php file এ গিয়ে এগুলোর জন্য custom function তৈরী করতে হবে।
৪.functions.php file এ add_theme_support() function এর মাধ্যমে আমাদের থিম এ image thumbnail ফীচার টি activate করতে হবে।
৫. sidebar.php ফাইল এ কাস্টম ফাঙ্কশন ব্যবহার করতে হবে।
আমরা ধরে নিয়েছি আমি ১ এবং ২ নম্বর কাজটি করে ফেলেছেন , এখন function.php file এ আমাদের থিম এ image thumbnail ফীচার টি activate করার জন্য নিচের code টি লিখুন:
1 2 3 4 | function w3_post_thumbnails() { add_theme_support( 'post-thumbnails' );}add_action( 'after_setup_theme', 'w3_post_thumbnails' ); |
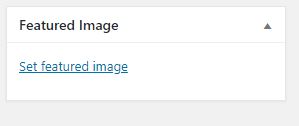
এখন আপনি wordpress এর প্রতিটি post পাশে set featured image feature টি দেখতে পাবেন ঠিক নিচের মতো করে।
featured image সুবিধা তো ফেলাম, এবার আপনার theme এর default thumbnail এর size এবং recent post এবং popular post এর thumbnail size কি হবে তা ঠিক করে দিতে হবে। আর এর জন্য আপনাকে functions.php file এ নিচের কোড গুলো লিখতে হবে।
1 2 3 | set_post_thumbnail_size( 200, 170, true ); // Sets the Post Main Thumbnails add_image_size( 'w3-recent-thumbnails', 50, 50, true ); // Sets Recent Posts Thumbnails add_image_size( 'w3-popular-thumbnails', 50, 50, true ); // Sets Popular Posts Thumbnails |
এবার আমরা আমাদের সাইট এ সব চেয়ে বেশি ভিসিট করা পোস্ট গুলোকে প্রদর্শনের জন্য functions.php file এ নিচের তিনটি function লিখব , চলুন শুরু করা যাক :
01 02 03 04 05 06 07 08 09 10 11 12 13 14 15 16 17 18 19 20 21 22 23 24 25 26 27 28 29 30 31 32 33 34 35 36 37 38 39 40 41 42 43 44 45 46 47 48 49 50 | function w3_track_posts($post_id) { if (!is_single()) return; if (empty($post_id)) { global $post; $post_id = $post->ID; } w3_count_popular_posts($post_id);}add_action('wp_head', 'w3_track_posts');function w3_count_popular_posts($post_id) { $count_key = 'popular_posts'; $count = get_post_meta($post_id, $count_key, true); if ($count == '') { $count = 0; delete_post_meta($post_id, $count_key); add_post_meta($post_id, $count_key, '0'); } else { $count++; update_post_meta($post_id, $count_key, $count); }}function w3_popular_posts() { $w3_popular_posts = new WP_Query(array('posts_per_page'=>7, 'meta_key'=>'popular_posts', 'orderby'=>'meta_value_num', 'order'=>'DESC')); while ($w3_popular_posts->have_posts()) : $w3_popular_posts->the_post(); ?> <li> <div class="post-image"> <div class="img-thumbnail d-block"> <a href="<?php esc_url(the_permalink()); ?>"> <?php the_post_thumbnail('w3-popular-thumbnails'); ?> </a> </div> </div> <div class="post-info"> <a href="<?php esc_url(the_permalink()); ?>"> <?php esc_html(the_title()); ?></a> <div class="post-meta"> <?php echo get_the_date( 'M d, Y' ); ?> <?php the_time( 'H:i:s' ); ?> </div> </div> </li> <?php endwhile; wp_reset_postdata();} |
ব্যাখ্যা: এখানে আমরা আমাদের wordpress site এর popular post গুলো প্রদর্শনের জন্য functions.php ফাইল এ তিনটি functions তৈরী করতে হবে।
১. w3_track_posts() function যেটি দিয়ে আপনি আপনার ওয়েবসাইট এর কোন পোস্ট এ কতবার ভিসিট হচ্ছে তা track করতেছেন , একই সাথে w3_count_popular_posts() function দিয়ে count করে রাখতেছেন।
২. w3_popular_posts() function এর মাধ্যমে আমরা wordpress এর একটি query run এর মাধ্যমে আমাদের design এর মাধ্যমে সব চেয়ে বেশি ভিজিটেড post গুলোকে Most Popular Post হিসেবে প্রদর্শন করেছি।
এবার আমরা আমাদের wordpress site এ পাবলিশ হওয়া Recent Post গুলো কে প্রদর্শনের জন্য functions.php ফাইল এ w3_recent_posts() নামে একটা function তৈরী করব। নিচে আমাদের w3_recent_posts() function টি লক্ষ্য করুন :
01 02 03 04 05 06 07 08 09 10 11 12 13 14 15 16 17 18 19 20 21 22 23 24 25 26 | function w3_recent_posts() { $w3_recent_posts = new WP_Query(); $w3_recent_posts->query('showposts=3'); while ($w3_recent_posts->have_posts()) : $w3_recent_posts->the_post(); ?> <li> <div class="post-image"> <div class="img-thumbnail d-block"> <a href="<?php esc_url(the_permalink()); ?>"> <?php the_post_thumbnail('w3-recent-thumbnails'); ?> </a> </div> </div> <div class="post-info"> <a href="<?php esc_url(the_permalink()); ?>"> <?php esc_html(the_title()); ?></a> <div class="post-meta"> <?php echo get_the_date( 'M d, Y' ); ?> <?php the_time( 'H:i:s' ); ?> </div> </div> </li> <?php endwhile; wp_reset_postdata();}?> |
ব্যাখ্যা: এখানে মূলত আমাদের সর্বশেষ পাবলিশ হওয়া তিনটি post কে প্রদর্শন করার জন্য একটি wordpress query লেখি এবং loop এর মাধ্যমে প্রদর্শন করি।
মোটামুটি, আমাদের Popular Post এবং Recent Post গুলো প্রদর্শনের জন্য functions.php file এর কাজ শেষ। এখন আপনাকে এগুলোকে sidebar.php ফাইল এ প্রদর্শনের জন্য আপনার তৈরী ফাঙ্কশন দুটি যথাক্রমে w3_popular_posts এবং w3_recent_posts() function কে sidebar.php file এ ব্যবহার করতে হবে। নিচে আমাদের code লক্ষ্য করুন:
01 02 03 04 05 06 07 08 09 10 11 12 13 14 15 16 17 18 | <div class="tabs mb-5"> <ul class="nav nav-tabs"> <li class="nav-item active"><a class="nav-link" href="#popularPosts" data-toggle="tab"><i class="fas fa-star"></i> Popular</a></li> <li class="nav-item"><a class="nav-link" href="#recentPosts" data-toggle="tab">Recent</a></li> </ul> <div class="tab-content"> <div class="tab-pane active" id="popularPosts"> <ul class="simple-post-list"> <?php echo w3_popular_posts(); ?> </ul> </div> <div class="tab-pane" id="recentPosts"> <ul class="simple-post-list"> <?php echo w3_recent_posts(); ?> </ul> </div></div></div> |
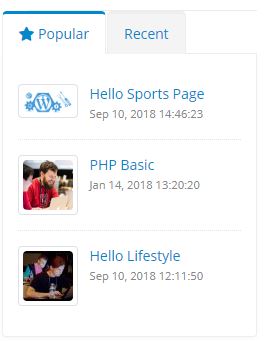
এখন আপনি আপনার sidebar এ নিচের মতো output দেখতে পাবেন :
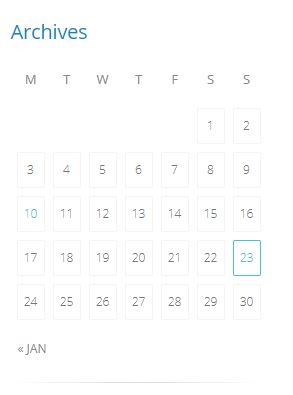
WordPress Post Archive ক্যালেন্ডার Customization:
WordPress CMS দিয়ে তৈরী ওয়েবসাইট এর Post গুলোর archive কে ক্যালেন্ডার এ প্রদর্শনের জন্য আমরা WordPress built in function get_calendar() function কে করবো। তার আগে চলুন প্রথমে দেখা যাক আমাদের আর্কাইভ ক্যালেন্ডার দেখতে কেমন হবে ?
এখন আপনি যদি, শুধু get_calendar(); function টি ব্যবহার করেন , তাহলে আপনি আপনার পছন্দ মতো ডিজাইন পাবেন না , আর পেতে হলে আপনাকে style.css ফাইল এ নিচের মতো একটা css লিখতে হবে।
01 02 03 04 05 06 07 08 09 10 11 12 13 14 15 16 17 18 19 20 21 22 23 24 25 26 27 28 29 30 31 32 33 34 35 36 37 38 39 40 41 42 43 44 45 46 47 48 49 50 51 52 53 54 55 56 57 58 59 60 61 62 63 64 65 66 67 68 69 70 71 72 73 74 75 76 | #wp-calendar {width:100%;font-size:12px;font-weight:300;border-collapse:separate;border-spacing:8px;margin-left:-2px;}#wp-calendarcaption {display:none;}#wp-calendar tbodytd {margin-bottom:10px;text-align:center;-webkit-border-radius:2px;-moz-border-radius:2px;-ms-border-radius:2px;-o-border-radius:2px;border-radius:2px;border:1px solid #f4f4f4;padding:6px;}#wp-calendar tbody td:hover {border-color:#e2e2e2;}#wp-calendar tbodytd.pad {border:0;}#wp-calendar tbodytd#today {color:#47C2DC;border-color:#47C2DC;}#wp-calendar tfoot td#prev a,#wp-calendar tfoot td#nexta {color:#888;font-size:12px;font-weight:400;position:relative;text-transform:uppercase;bottom:-9px;margin-bottom:1px;}#wp-calendar tfoottd#prev {text-align:left;}#wp-calendar tfoottd#next {text-align:right;}#wp-calendar theadth {font-size:13px;font-weight:400;color:#888;text-align:center;padding-bottom:10px;}#wp-calendar tbody tda,#wp-calendar tfoot td#prev a:hover,#wp-calendar tfoot td#next a:hover {color:#47C2DC;} |
One thought on “WordPress Theme Development in Bangla Part-5: WordPress Sidebar Customization”
Leave a Reply
You must be logged in to post a comment.
Thanks for the post of the scholarly.